This subchapter is provided as a free sample for Integrating SwiftUI into UIKit Apps book.
You can read this subchapter online or download the sample bundle with PDF, EPUB and sample code by clicking the link below.
Download free sampleTo get access to the contents of the whole book you need to purchase a copy.
FREE SAMPLE - online version
Sample subchapter introduction: In this subchapter we are going to add a SwiftUI view to an existing UIKit application that uses storyboards. The sample app is called Puppy Training. Its main screen built in UIKit shows a collection of tricks to teach to a new puppy. We are going to be adding a filter functionality to that sample UIKIt app using SwiftUI. To follow along you can download the starter project and you can also get the final project to check the end result. Both projects have been updated for Xcode 26 and support iOS 18 and iOS 26 by default.
Setting up Hosting Controller in storyboards
When working with storyboards in UIKit, we can use a Hosting Controller from the object library to present a SwiftUI view hierarchy. The controller created in the storyboard can be prepared for presentation inside the storyboard segue action.
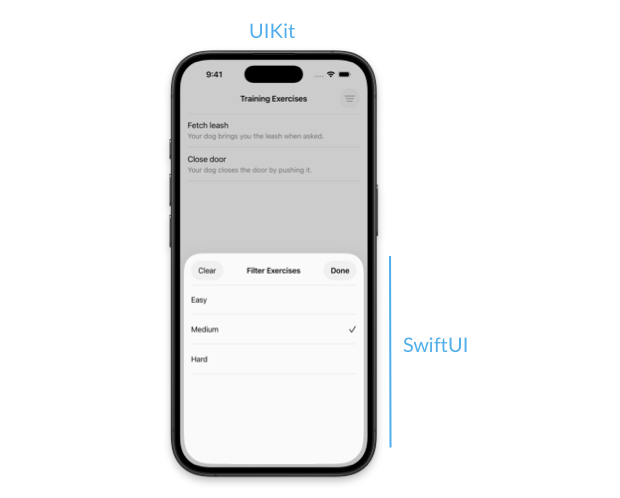
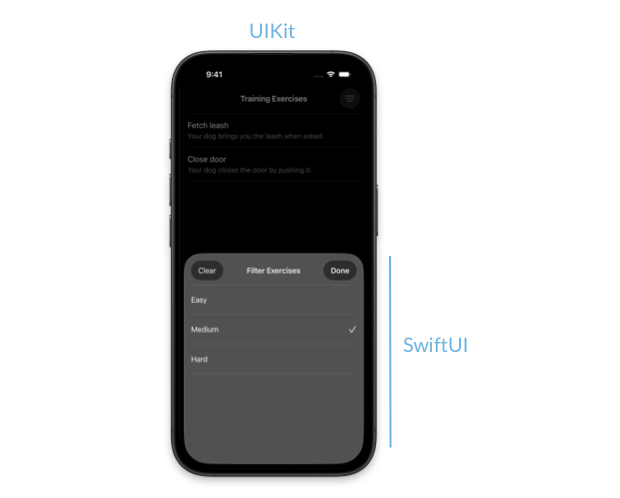
We will add a filter view built in SwiftUI to our sample Puppy Training app where users can filter the exercises based on the difficulty level. The filter will be presented in a bottom sheet using a storyboard segue.
# Prepare the filter state data model
We'll start by defining the data model for the filter in a separate file called ExerciseFilterState.swift. The view controller in UIKit will own the data model and pass it to the SwiftUI filter view to modify the selection. So that the change in selection can be reflected in both the filter list and the collection view, the object encapsulating it has to be marked with @Observable macro from the Observation framework.
import Observation

@Observable
class ExerciseFilterState {
    var selection: Exercise.Difficulty?
}
The ExercisesViewController defined inside the ExercisesViewController.swift file will store an instance of the ExerciseFilterState and later pass it to the SwiftUI view. We are going to assign the object to a private property on the view controller.
class ExercisesViewController: UIViewController,
    UICollectionViewDelegate {

    private let filterState = ExerciseFilterState()

    ...
}
To make sure that the List view in the filter sheet can iterate over the difficulty levels, we'll make the Exercise.Difficulty enum conform to CaseIterable. The exercise model can be found in the Exercise.swift file in the Data folder.
struct Exercise: Hashable {
    enum Difficulty: CaseIterable {
        case easy
        case medium
        case hard

        var description: String {
            switch self {
            case .easy: return "easy"
            case .medium: return "medium"
            case .hard: return "hard"
            }
        }
    }

    ...
}
# Build the filter view in SwiftUI
Next, we'll build the SwiftUI view we want to present. We are going to define the list of the exercise difficulty levels in a separate component and then embed it into a container with the navigation bar title and controls.
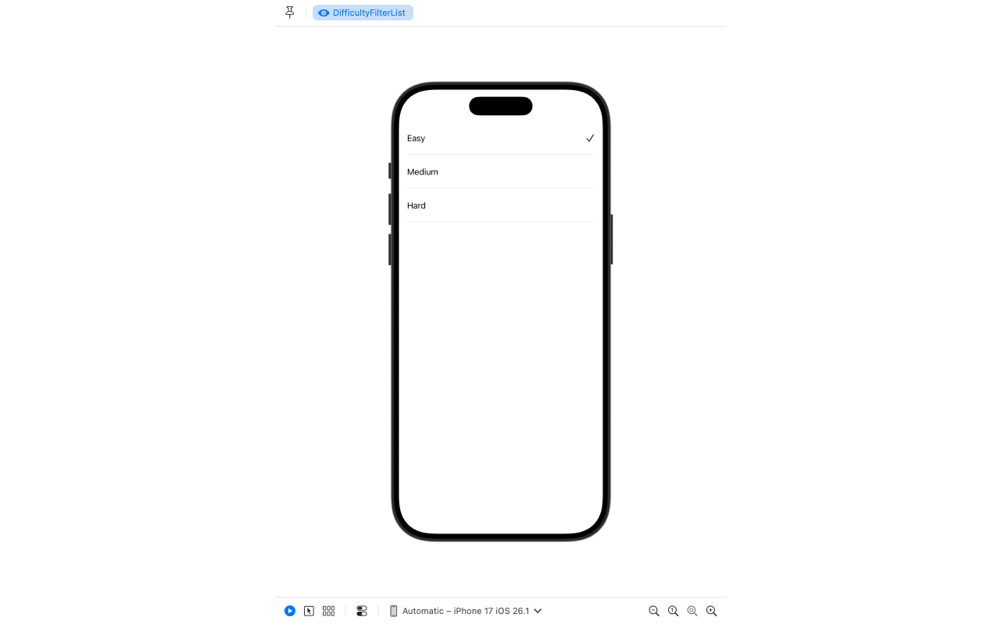
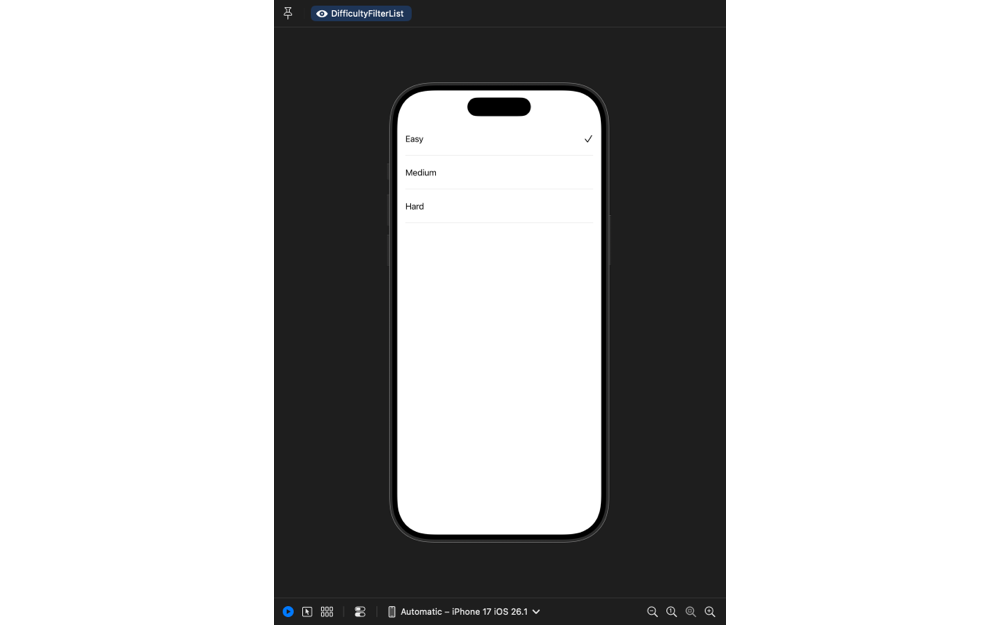
We'll create a new file called DifficultyFilterList.swift using the SwiftUI View template. The view will receive a binding to an optional Exercise.Difficulty to mark the selection. Each difficulty level will be presented in a List row. The currently selected level for the filter will be marked with a checkmark symbol image.
The user will be able to select the difficulty in the filter by tapping on a row. To make sure that the tap gesture is activated when the user taps anywhere in the row and not just on the text or the image, we'll apply the contentShape(.interaction, Rectangle()) modifier.
struct DifficultyFilterList: View {
    @Binding var selection: Exercise.Difficulty?

    var body: some View {
        List(Exercise.Difficulty.allCases, id: \.self) { level in
            HStack {
                Text(level.description.capitalized)
                Spacer()

                if selection == level {
                    Image(systemName: "checkmark")
                }
            }
            .padding(.vertical, 8)
            .contentShape(.interaction, Rectangle())
            .onTapGesture {
                selection = level
            }
            .accessibilityElement(children: .combine)
            .accessibilityAddTraits(.isButton)
        }
        .listStyle(.plain)
    }
}
To be able to preview the DifficultyFilterList view in the canvas, we have to slightly modify the preview. The DifficultyFilterList has to accept a binding to a difficulty level, so we will create a @Previewable @State selection variable inside the preview and pass it to DifficultyFilterList to modify. This way we can interact with our preview and test how selection behaves.
#Preview {
    @Previewable @State var selection: Exercise.Difficulty? = .easy

    DifficultyFilterList(
        selection: $selection
    )
}
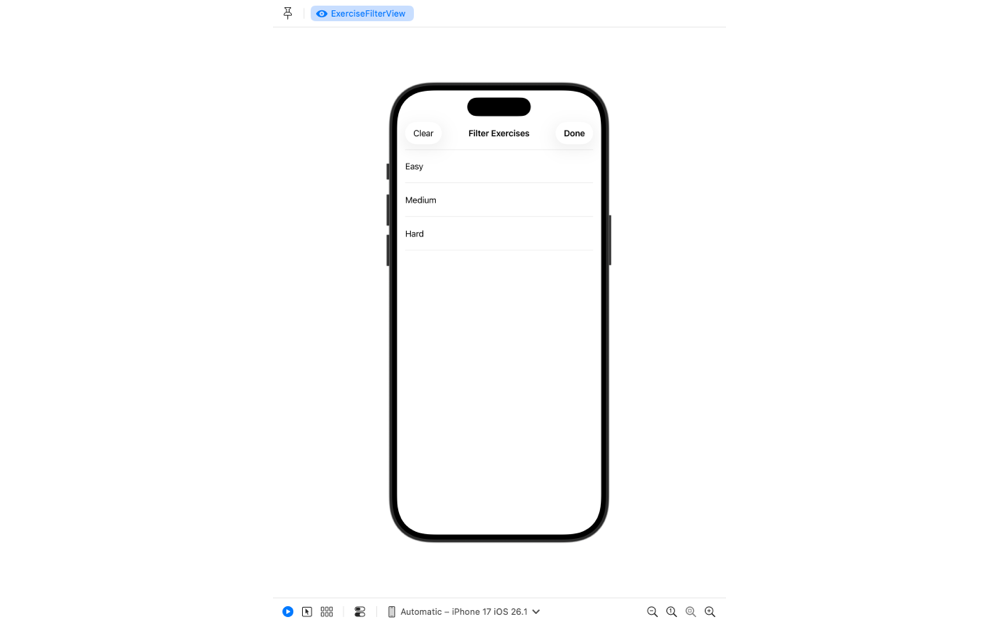
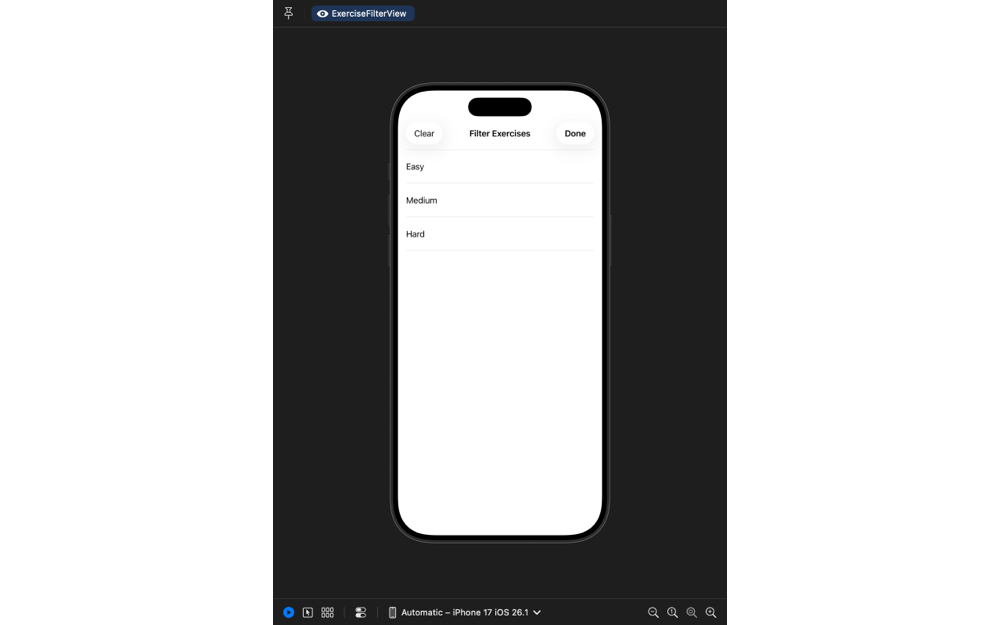
Now we can define the filter view itself. We'll create another file called ExerciseFilterView.swift also with the SwiftUI View template. The ExerciseFilterView will receive the ExerciseFilterState object from UIKit, so we'll add a filterState property to the view struct. The property has to be marked with the @Bindable wrapper, because we need to get a binding to its selection property.
The DifficultyFilterList that we created earlier will be wrapped into a NavigationStack. Since in this case the navigation bar comes from the SwiftUI layer, we can set it up using SwiftUI APIs. We can add the title using the navigationTitle() modifier, set its display mode to inline and add some navigation bar buttons. When we add buttons using the toolbar() modifier in SwiftUI, they go into the navigation bar by default.
struct ExerciseFilterView: View {
    @Bindable var filterState: ExerciseFilterState
    @Environment(\.dismiss) private var dismiss

    var body: some View {
        NavigationStack {
            DifficultyFilterList(selection: $filterState.selection)
                .navigationTitle("Filter Exercises")
                .navigationBarTitleDisplayMode(.inline)
                .toolbar {
                    ToolbarItem(placement: .confirmationAction) {
                        Button("Done") {
                            dismiss()
                        }
                    }

                    ToolbarItem(placement: .cancellationAction) {
                        Button("Clear") {
                            filterState.selection = nil
                            dismiss()
                        }
                    }
                }
        }
    }
}
Note that we can dismiss the sheet from within the SwiftUI view using a SwiftUI API too. The dismiss action is injected into the environment by the framework and can be used to dismiss modals or pop views from the navigation stack.
To preview ExerciseFilterView in the canvas we simply need to pass it an ExerciseFilterState object instance.
#Preview {
    ExerciseFilterView(
        filterState: ExerciseFilterState()
    )
}
# Add a Hosting Controller in the storyboard
After we defined our SwiftUI view, we need to add a Hosting Controller to present the SwiftUI hierarchy from the UIKit layer of the app. We are going to do that in the Main.storyboard file.
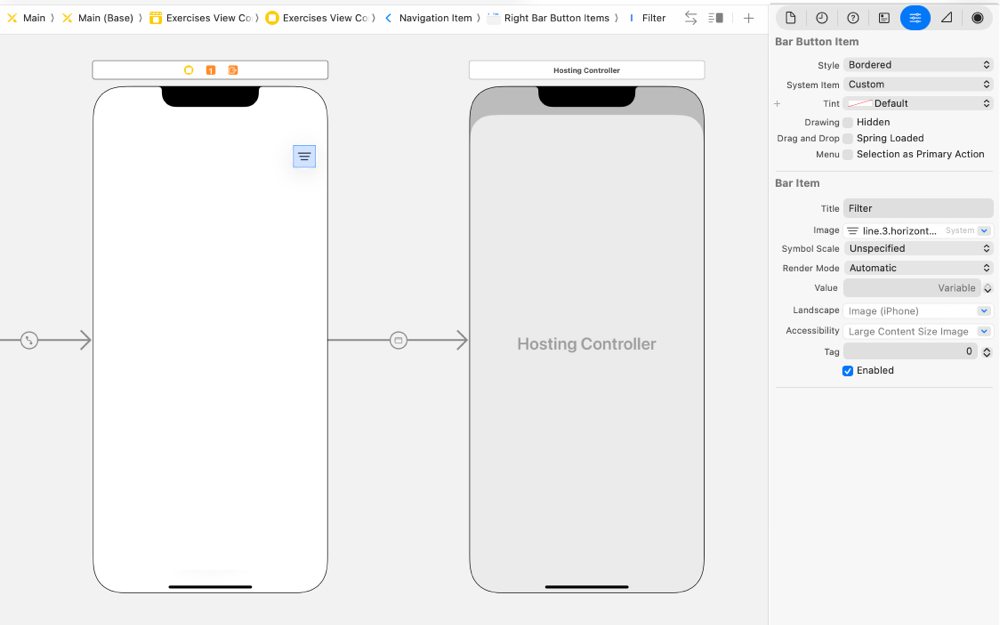
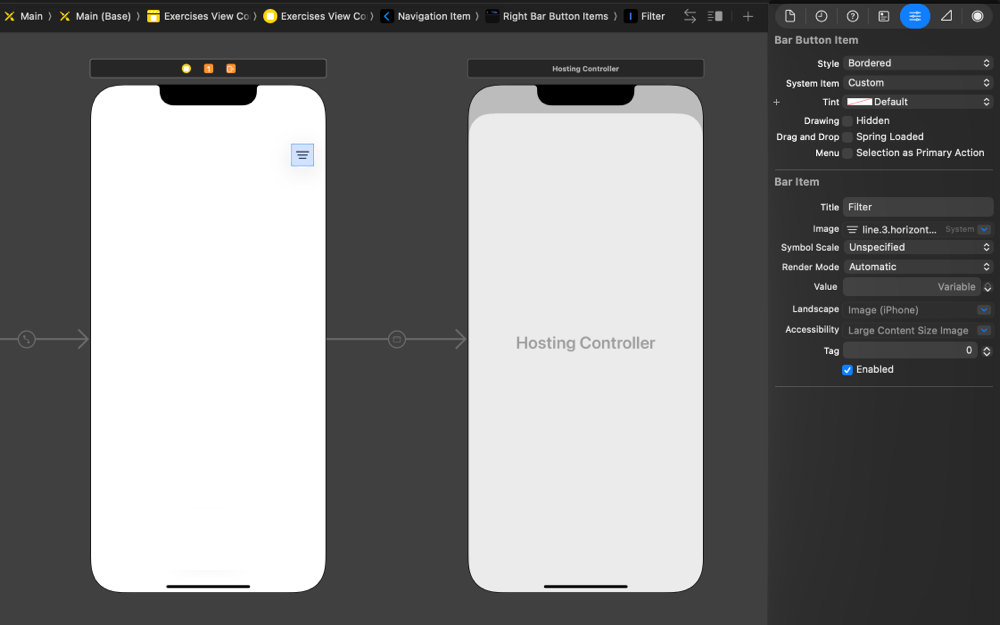
First, we'll add a Bar Button Item to the ExercisesViewController in the storyboard that will tigger the sheet presentation. We'll call it Filter and set the line.3.horizontal.decrease symbol as the image.
Then we'll drag a Hosting Controller from the object library to the canvas and add a Present Modally segue from the filter button to the Hosting Controller.
We still need to set our ExerciseFilterView as the root view of the Hosting Controller we just added. We can do that in the segue action method. We'll open the ExercisesViewController.swift in the assistant editor and control-drag from the segue to an area inside the controller. Using the popup that appears, we'll create a Segue Action and call it showFilter. Inside this action we can prepare the Hosting Controller for presentation.
We will create an instance of the ExerciseFilterView and pass it the filterState stored in the view controller. Then we will initialize a UIHostingController with the coder passed to the action and the SwiftUI view. Once the controller is created, we can customize it the way we would a regular UIViewController. Here we are going to set a medium detent on its sheetPresentationController property so that the filter sheet only covers half of the screen.
class ExercisesViewController: UIViewController,
    UICollectionViewDelegate {
    ...

    @IBSegueAction func showFilter(
        _ coder: NSCoder
    ) -> UIViewController? {
        let filterView = ExerciseFilterView(
            filterState: filterState
        )
        let controller = UIHostingController(
            coder: coder, rootView: filterView
        )
        controller?.sheetPresentationController?.detents = [
            .medium()
        ]
        return controller
    }
]
If we run the app now and press the filter button the sheet will appear as expected. The SwiftUI side already works correctly and tapping on a difficulty level will add a checkmark to the row. But the UIKit part is not set up to react to the changes in the filter state yet.
# Update UIKit layer from SwiftUI
The last thing left to do for the filter to function is to update the collection view to reflect the selection. We need to change the updateUI() method defined in the ExercisesViewController to read the selection property from the filter state. It will use the selection value to filter the exercises provided by the ExercisesController and update the data source with a new snapshot. Starting from iOS 26, UIKit automatically tracks Observable objects referenced in update methods such as viewWillLayoutSubviews(), and since it's where we call the updateUI() method, we don't need any extra setup to refresh the UI, when the selection property in the ExerciseFilterState object changes.
class ExercisesViewController: UIViewController,
    UICollectionViewDelegate {
    ...

    private let filterState = ExerciseFilterState()

    override func viewWillLayoutSubviews() {
        super.viewWillLayoutSubviews()

        updateUI()
    }

    private func updateUI() {
        let filterSelection = filterState.selection

        let exercises = exercisesController.exercises.filter { exercise in
            filterSelection.map { $0 == exercise.difficulty } ?? true
        }

        var snapshot = NSDiffableDataSourceSnapshot<Section, Exercise>()
        snapshot.appendSections([.main])
        snapshot.appendItems(exercises, toSection: .main)

        dataSource.apply(snapshot)
    }
}
Note, that to support automatic UI updates triggered by Observable class property changes on iOS 18, we need to add the UIObservationTrackingEnabled flag to Info.plist and set it to YES.
Now the UIKit controller and the SwiftUI filter view are fully connected and the changes in the filter are properly reflected in the collection view.